J-SODD Manual
Main Screens
Screen List
| Screen Name | URL | Overview |
|---|---|---|
| Map Search Screen | /chikyu/mapsearch/ | Displays drilling holes on a map. |
| Data Search Screen | /chikyu/datasearch/ | Displays drilling hole information in a table format. |
| Data Detail Screen | /chikyu/datadetail/ | Displays detailed diagrams of drilling holes. |
Screen Transition Diagram
Map Search Screen
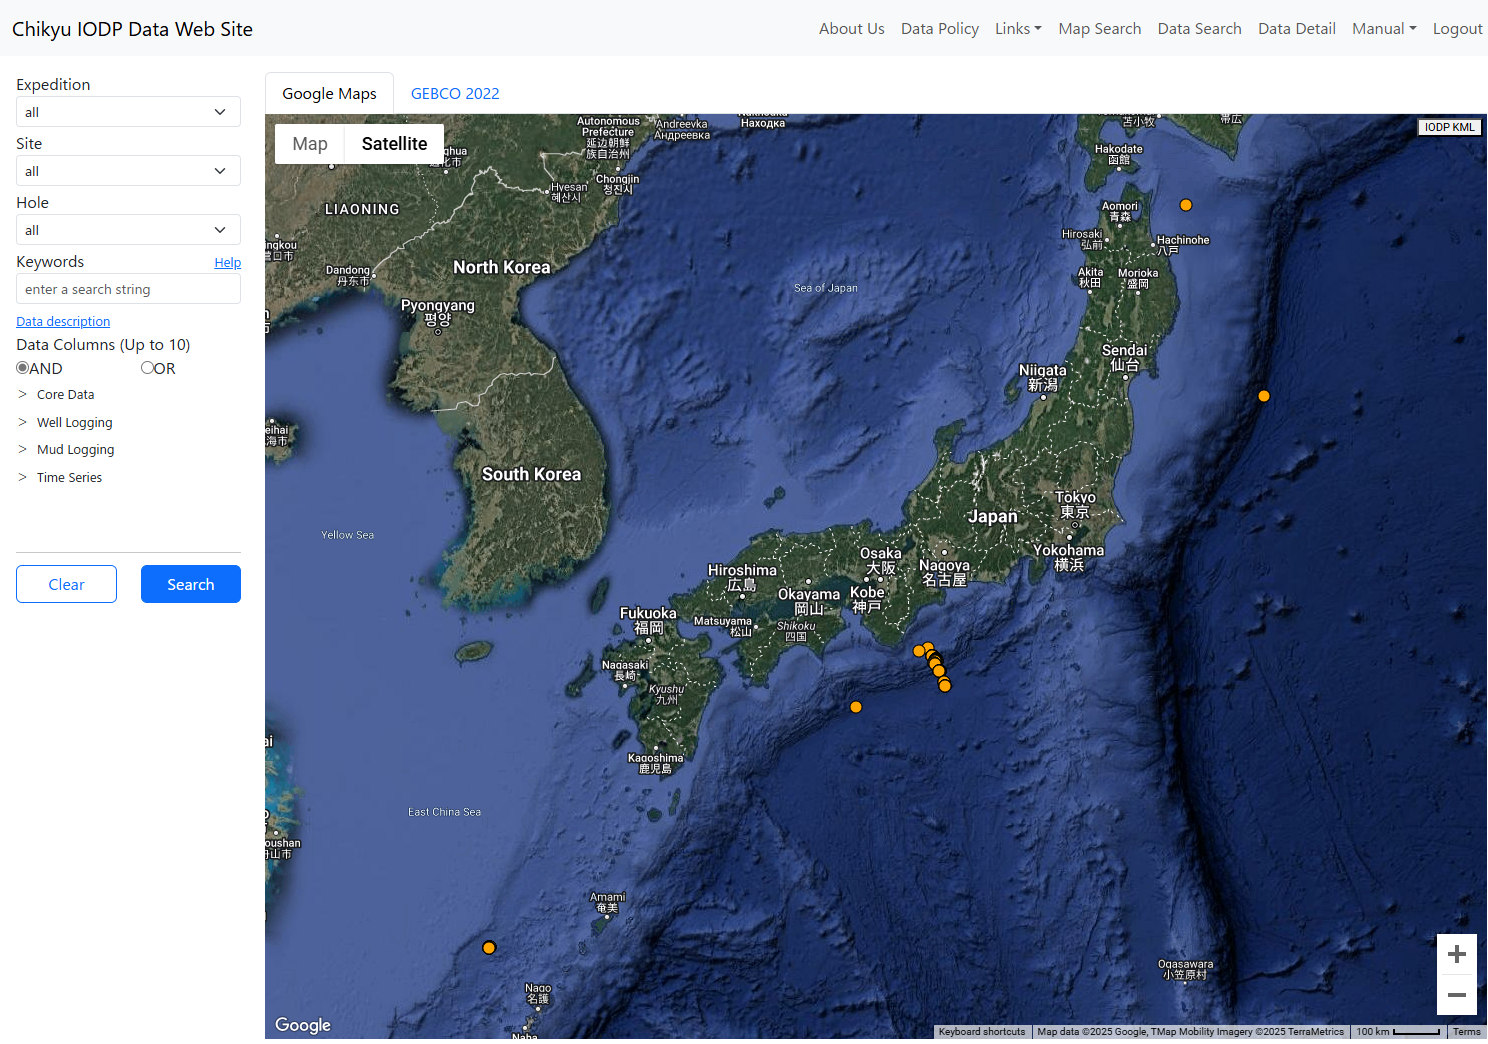
Map Search Screen Overview
Search Control
Filter the drilling hole information displayed on the map.
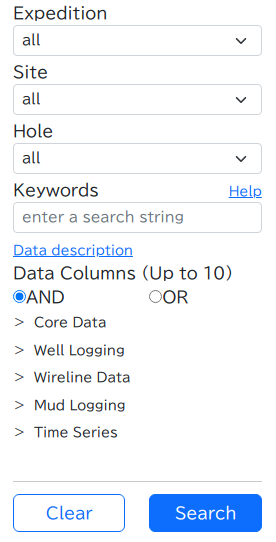
Map Search Screen Search Control
- Expedition
- Menu to select the target expedition.
Select "all" if no specific expedition is targeted. - Site
- Menu to select the target drilling site.
Select "all" if no specific site is targeted. - Hole
- Menu to select the target drilling hole.
Select "all" if no specific hole is targeted. - Keywords
- Input field to specify keywords contained in the target data. For details, refer to the help displayed by clicking "Help" next to Keywords.
Leave blank if no keywords are specified. - Data Columns
- Input field to specify data items that the target data should have. When multiple items are checked, you can set whether to search for "has all specified items" or "has any of specified items" using the AND/OR radio buttons.
Uncheck all items if no data items are specified. - Clear
- Button to clear search conditions.
- Search
- Button to set search conditions. Drilling holes matching the conditions will be extracted and displayed on the map.
Map
Displays drilling holes.
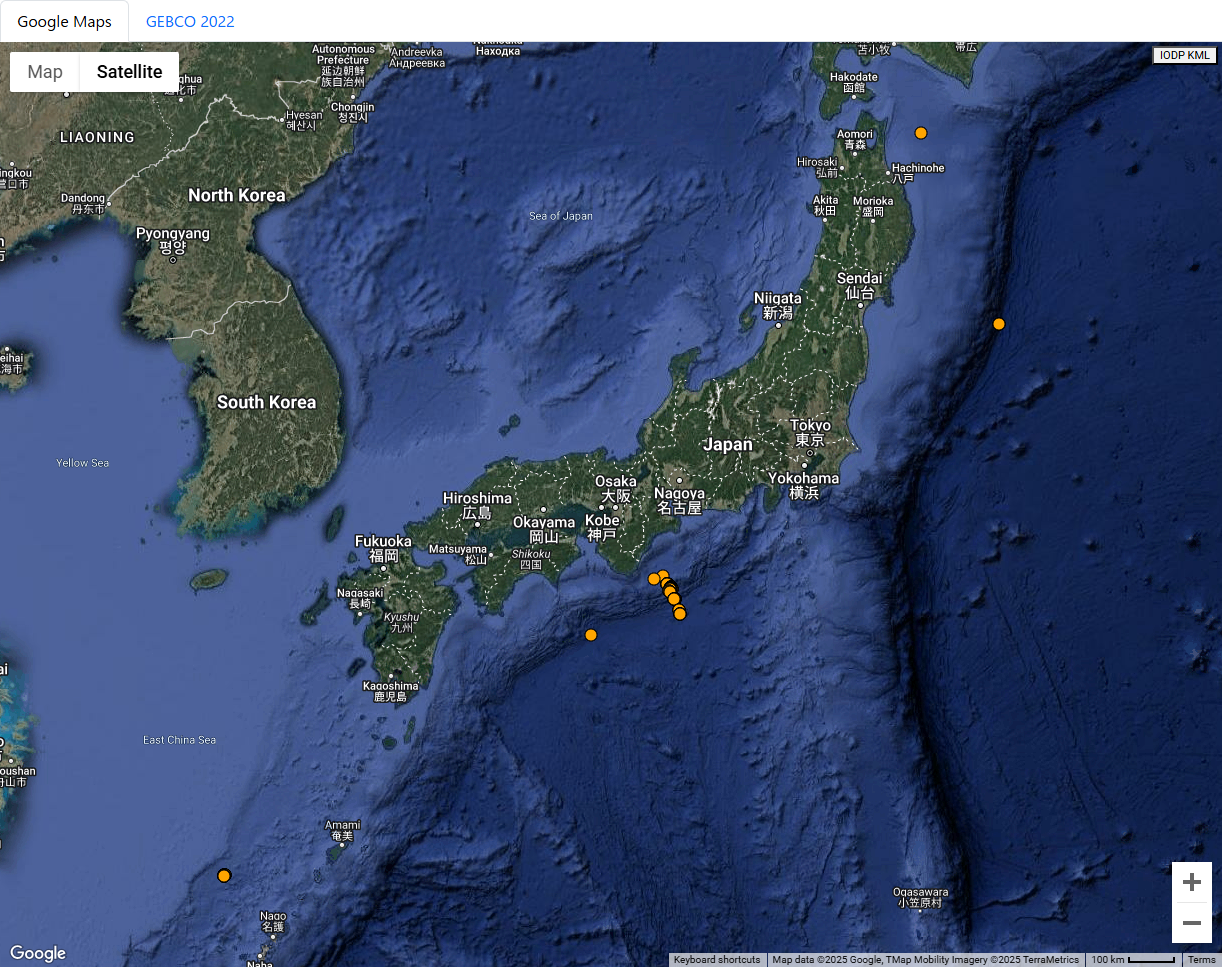
Map Search Screen Map
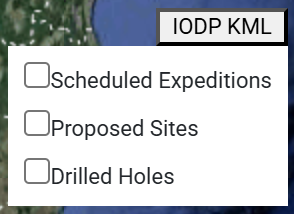
Map Search Screen IODP KML
Map Search Screen Hole Selection Control
- Google Maps
- Uses Google Maps as the background map.
When Google Maps is selected, you can choose between a standard map and satellite imagery as the background map. - GEBCO 2022
- Uses GEBCO WMS as the background map.
- Orange Markers
- Represents publicly available drilling holes.
Clicking a marker will display either the hole selection control if there are other holes nearby, or the hole detail dialog if there are none. - Gray Markers
- Represents non-public drilling holes.
Data can be viewed if logged in and granted viewing permissions. - IODP KML
- Loads KML files published by IODP and displays them as red markers on the map.
- Red Markers
- Represents drilling holes loaded from KML.
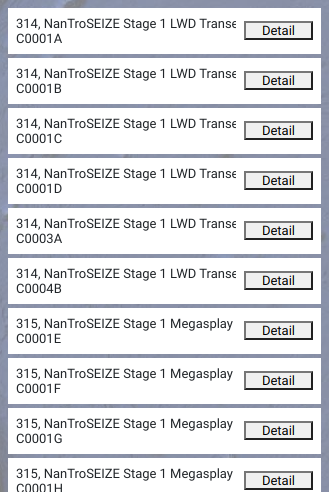
Clicking a marker will display information about that drilling hole in a popup. - Hole Selection Control
- Displayed when clicking on the map where multiple drilling holes are located nearby and cannot be narrowed down to one.
Clicking a hole name displays the hole detail dialog.
Clicking the Detail button navigates to the data detail screen with that hole selected.
Hole Detail Dialog
Displays details of the selected drilling hole.
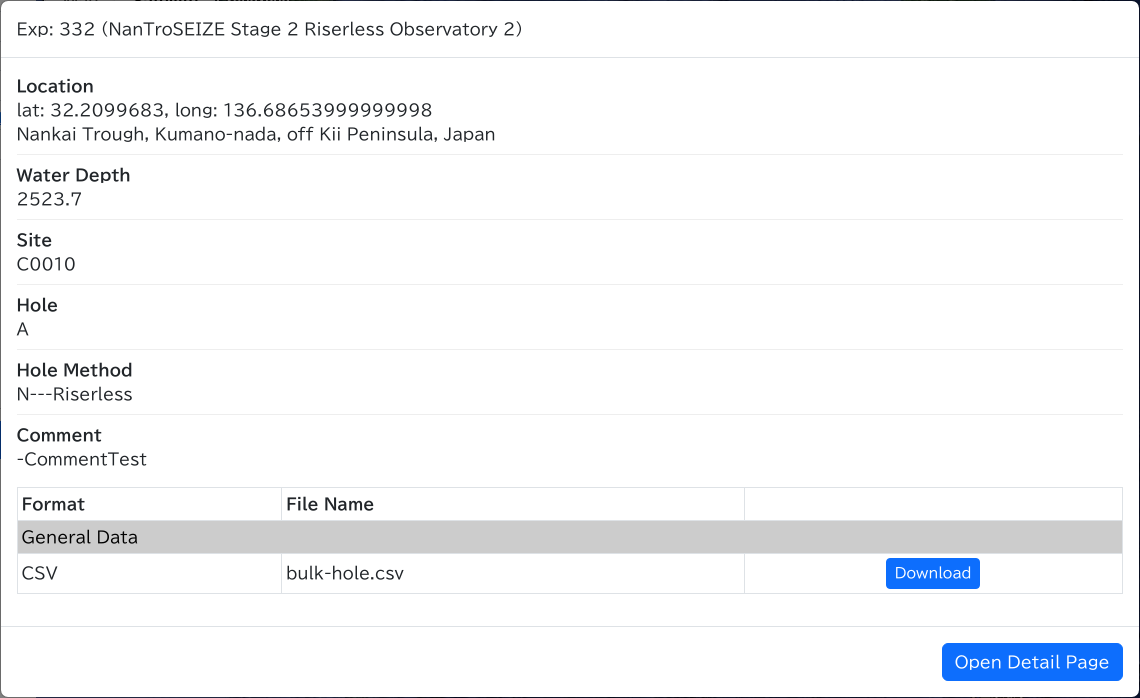
Map Search Screen Hole Detail Dialog
- Download
- Downloads the file when logged in.
- Open Detail Page
- Navigates to the data detail screen with this hole selected.
Data Search Screen
Data Search Screen Overview
Search Control
Filter the drilling hole information displayed in the table.
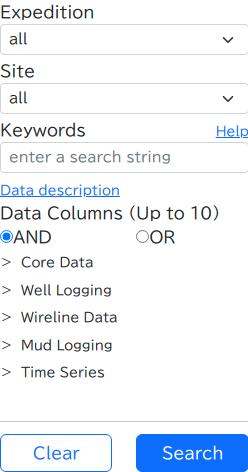
Data Search Screen Search Control
- Expedition
- Menu to select the target expedition.
Select "all" if no specific expedition is targeted. - Site
- Menu to select the target drilling site.
Select "all" if no specific site is targeted. - Keywords
- Input field to specify keywords contained in the target data. For details, refer to the help displayed by clicking "Help" next to Keywords.
Leave blank if no keywords are specified. - Data Columns
- Input field to specify data items that the target data should have. When multiple items are checked, you can set whether to search for "has all specified items" or "has any of specified items" using the AND/OR radio buttons.
Uncheck all items if no data items are specified. - Clear
- Button to clear search conditions.
- Search
- Button to set search conditions. Drilling holes matching the conditions will be extracted and displayed in the data list table.
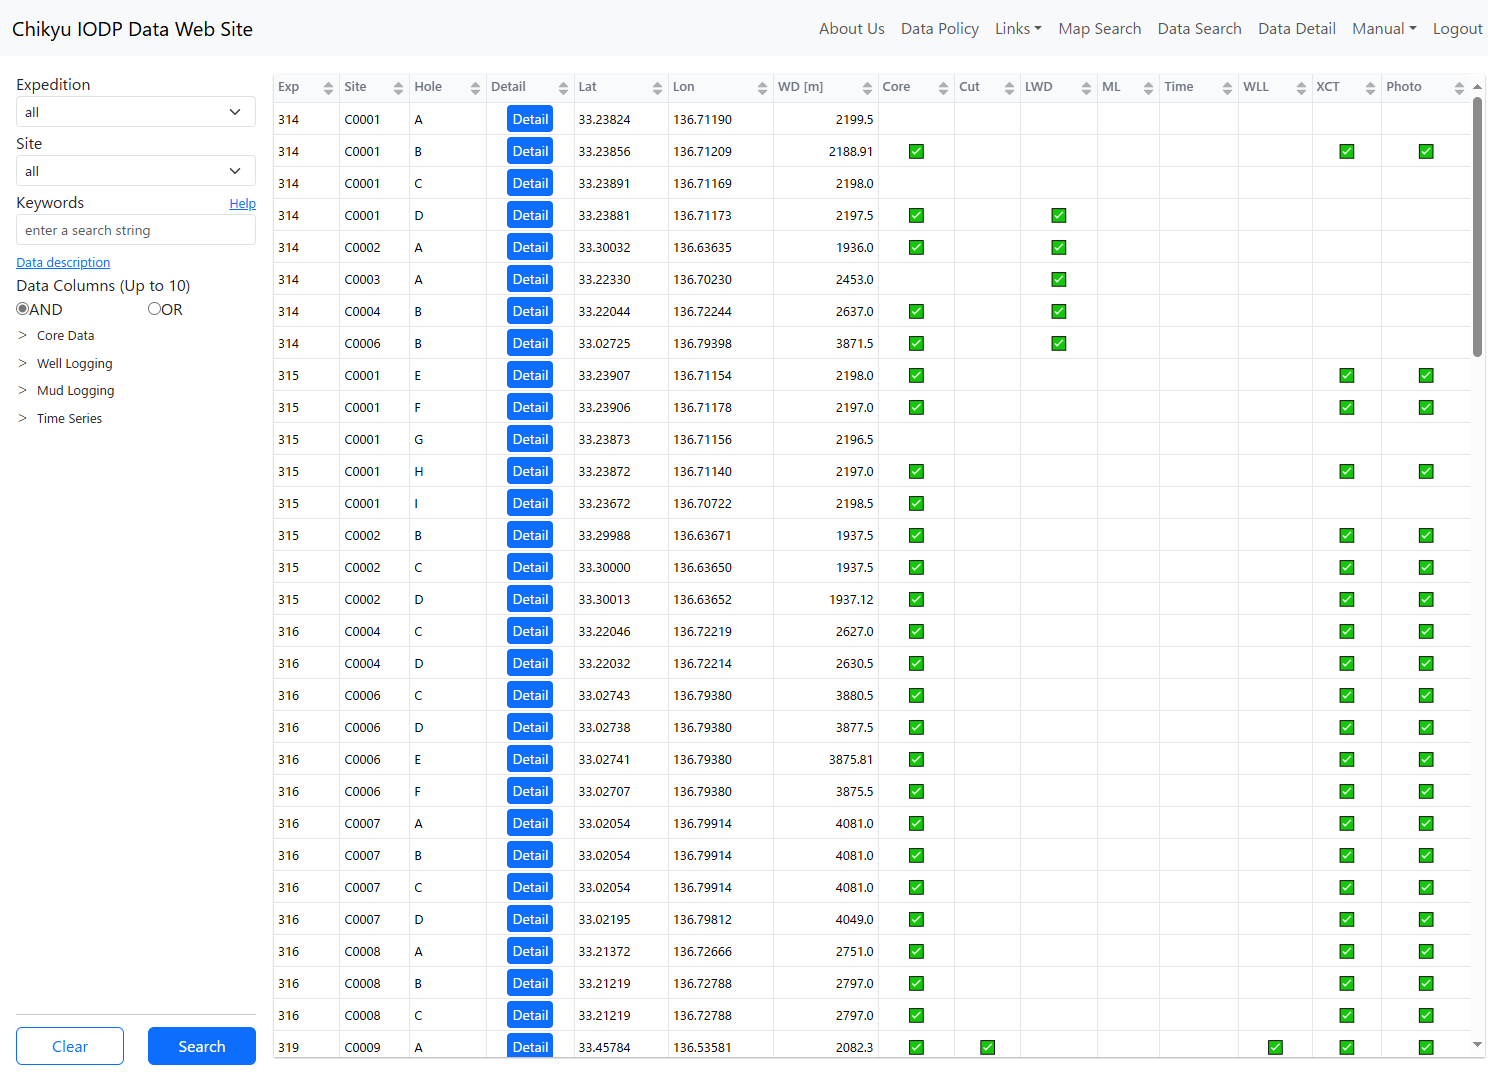
Data List Table
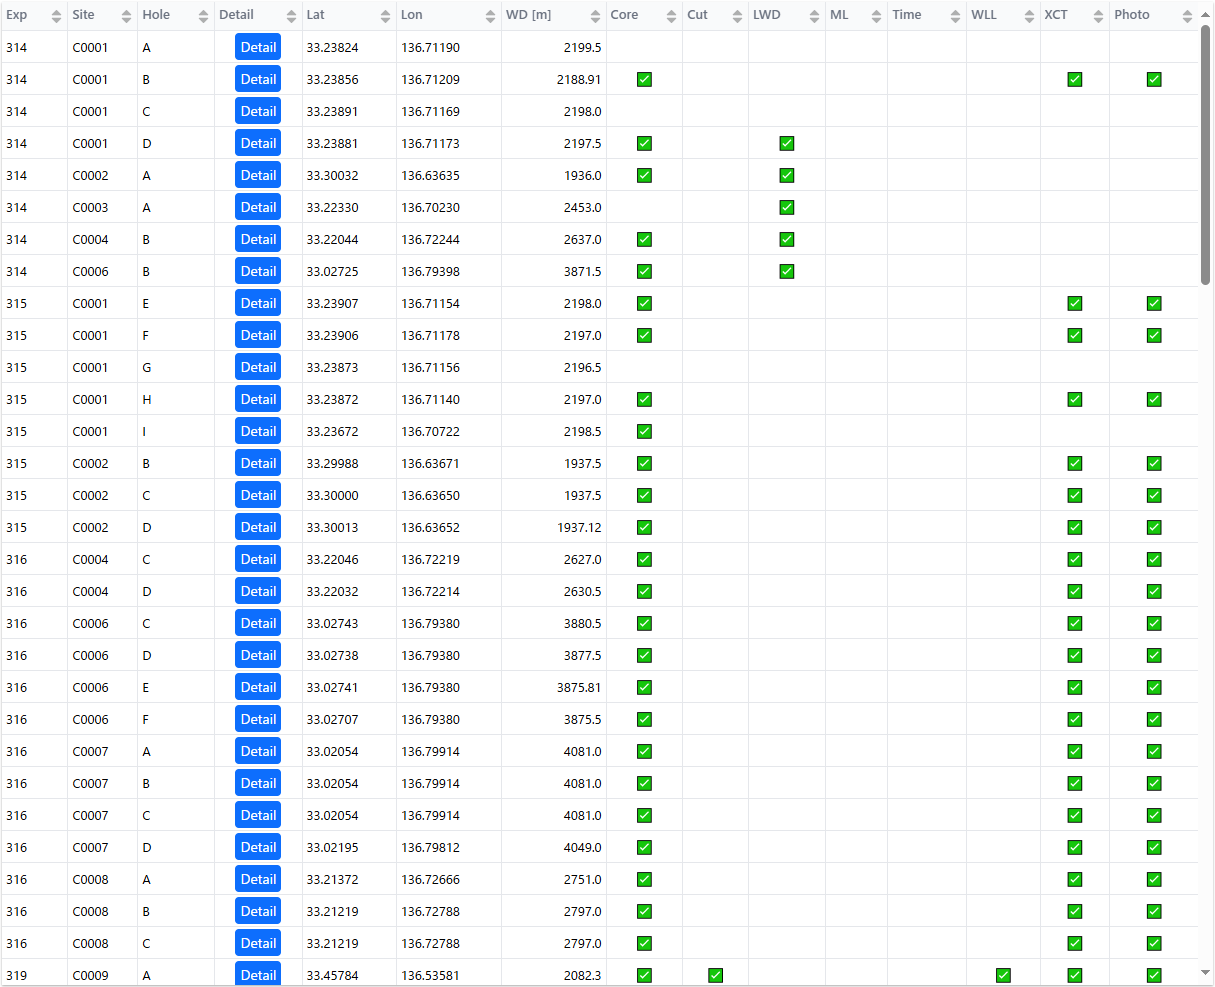
Data Search Screen Data List Table
- Header Row
- Click to sort ascending or descending using the values in that column.
Hover your mouse cursor over a column header to display a tooltip showing the full column name. - Data Row
- Click to display the drilling hole detail dialog.
- Detail
- Navigates to the data detail screen with that hole selected.
Hole Detail Dialog
Displays details of the selected drilling hole.
Data Search Screen Hole Detail Dialog
- Download
- Downloads the file when logged in.
- Open Detail Page
- Navigates to the data detail screen with this hole selected.
Data Detail Screen
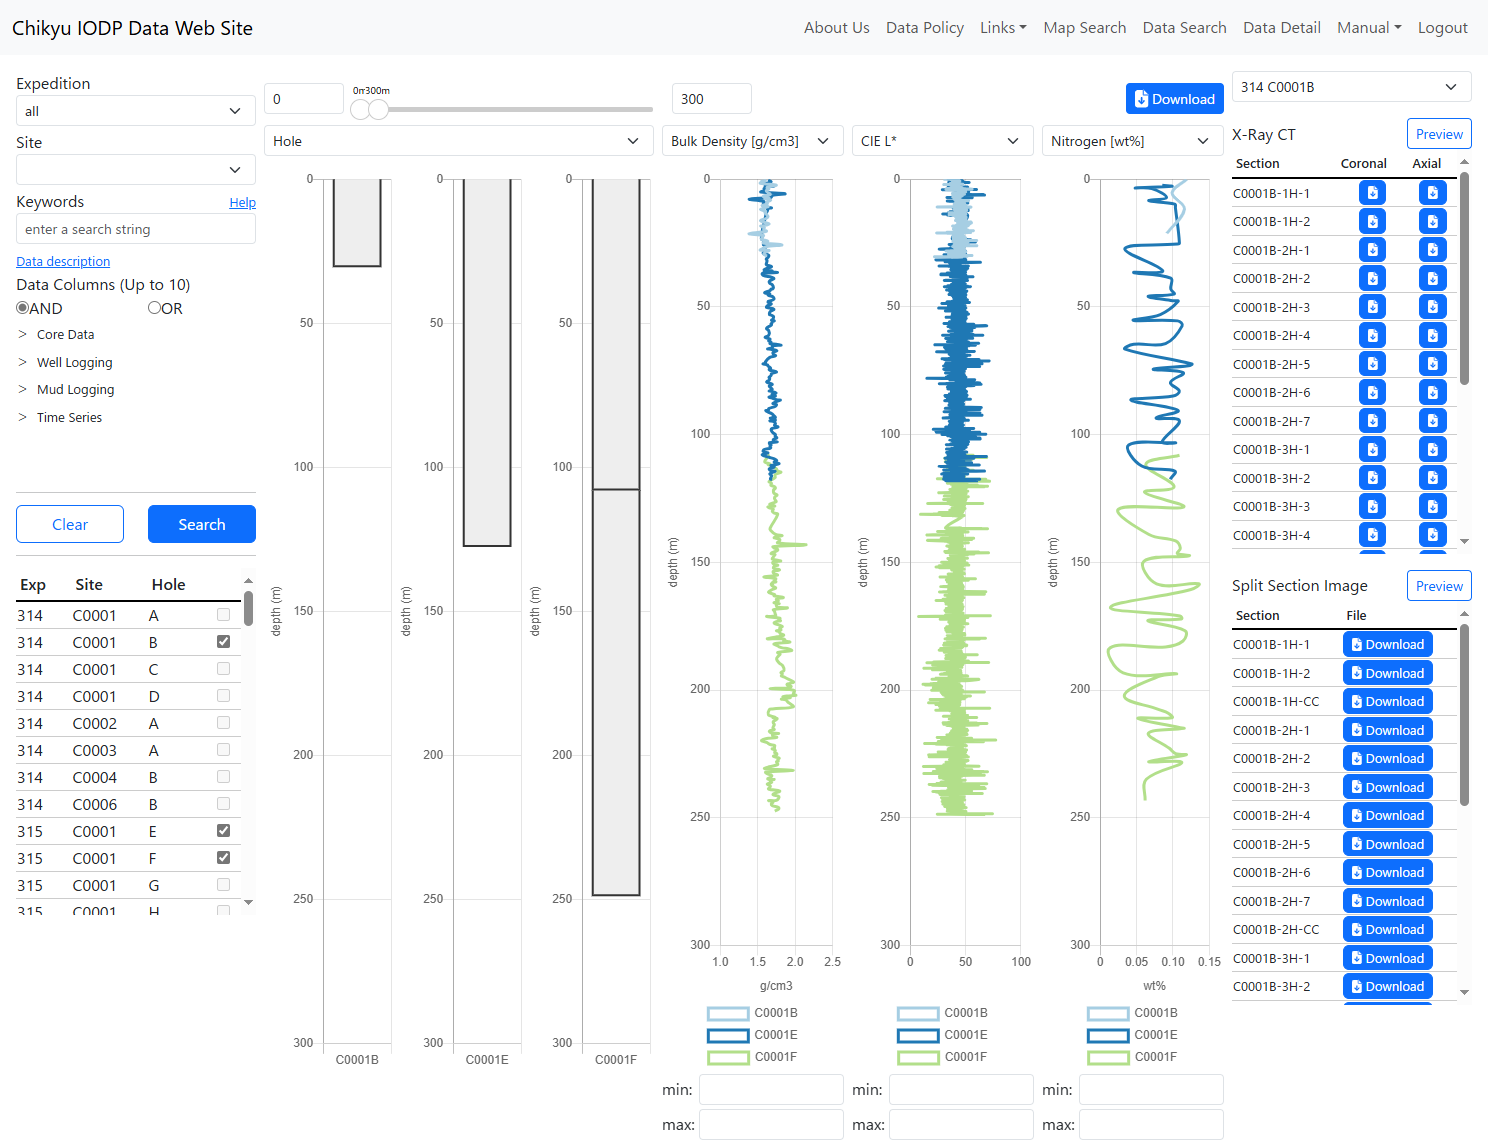
Data Detail Screen Overview
Search Control
Filter the target drilling hole information.
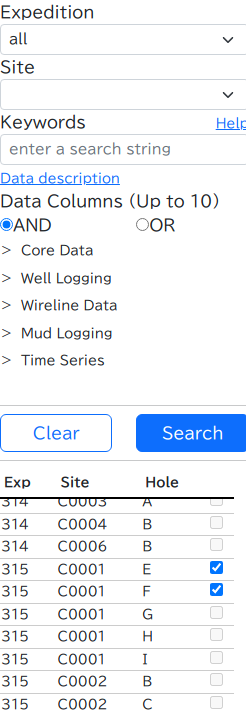
Data Detail Screen Search Control
- Expedition
- Menu to select the target expedition.
Select "all" if no specific expedition is targeted. - Site
- Menu to select the target drilling site.
Select "all" if no specific site is targeted. - Keywords
- Input field to specify keywords contained in the target data. For details, refer to the help displayed by clicking "Help" next to Keywords.
Leave blank if no keywords are specified. - Data Columns
- Input field to specify data items that the target data should have. When multiple items are checked, you can set whether to search for "has all specified items" or "has any of specified items" using the AND/OR radio buttons.
Uncheck all items if no data items are specified. - Clear
- Button to clear search conditions.
- Search
- Button to set search conditions. Drilling holes matching the conditions will be extracted and displayed in the hole list table.
- Hole List Table
- Displays drilling holes matching the search conditions.
Click the checkbox on the right side of the table to display information about that hole. Up to 3 holes can be selected.
Data Chart
Displays charts for the selected drilling holes.
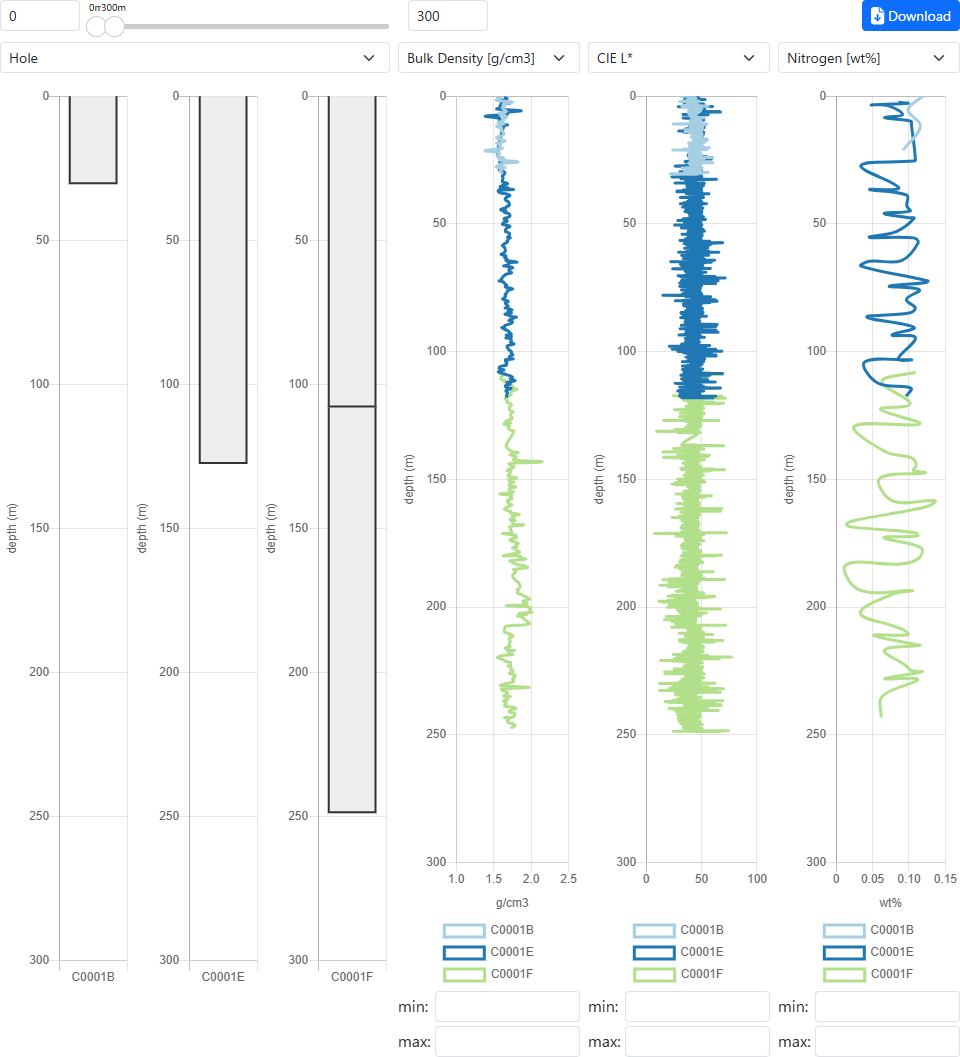
Data Detail Screen Data Chart
- Depth Setting Slider
- Sets the range to display in the chart.
Drag the slider handles or directly input numbers to set any range between 0m and 5000m. - Drilling Hole Core Data Column Chart
- Displays depth information for "Hole," "Core," and "Section" of the specified drilling hole as a column chart.
Items to display can be selected from the menu. - Logging Data Line Graph
- Displays logging data of the specified drilling hole as a line graph.
If lines overlap and are difficult to see, you can toggle individual displays on/off by clicking the legend below the graph.
Items to display can be selected from the menu. - Logging Data Range Setting Input
- Manually set the value range (horizontal axis) for the logging data line graph.
Usually sets the optimal range automatically, but used when wanting to focus on specific parts or when automatic setting isn't functioning due to spike noise. - Download
- Downloads the depth information of the currently displayed logging data in CSV format.
Only available when logged in.
Preview Area
Preview and download X-ray CT and split section images of drilling holes.
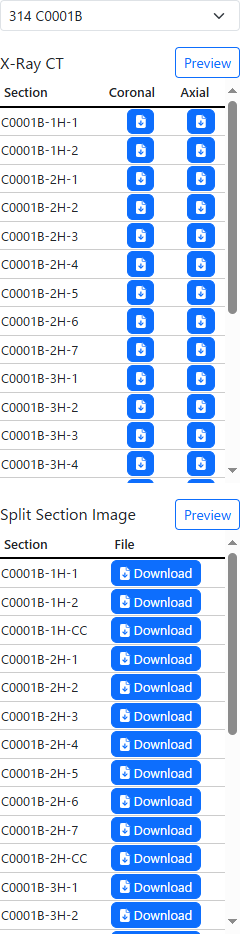
Data Detail Screen Preview Area

Data Detail Screen X-ray CT Preview
Data Detail Screen Split Section Image Preview
- Hole Menu
- Select the target hole.
- X-Ray CT Preview
- Displays X-ray CT preview.
- X-Ray CT Coronal Download
- Downloads X-ray CT coronal image files.
Only available when logged in. - X-Ray CT Axial Download
- Downloads X-ray CT axial image files.
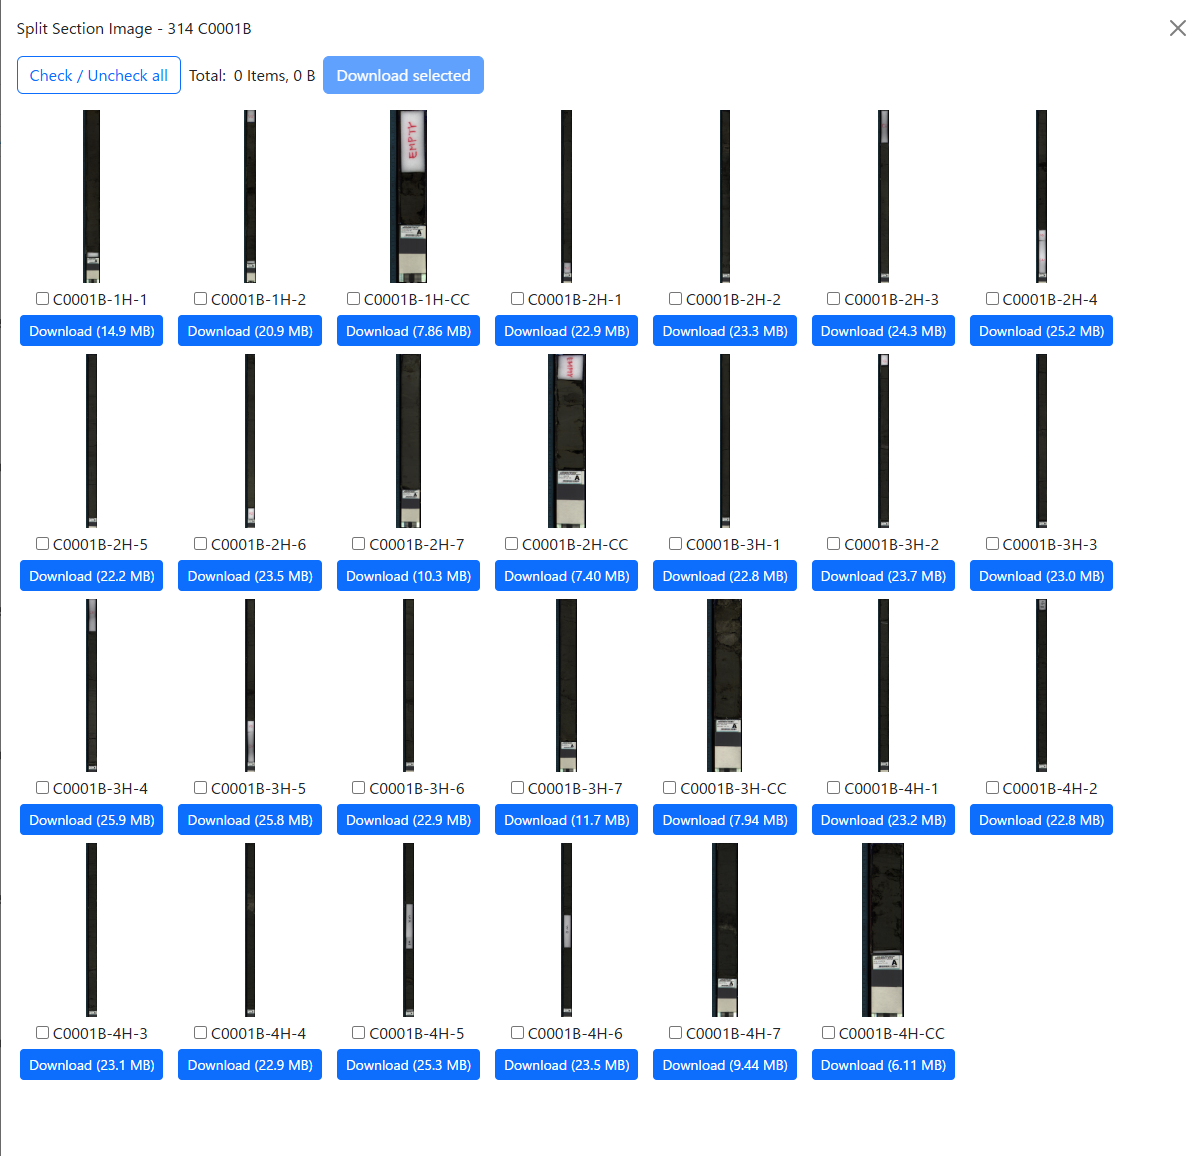
Only available when logged in. - Split Section Image Preview
- Displays split section image preview.
- Split Section Image Download
- Downloads individual split section image files.
Only available when logged in. - Download Target Checkbox
- Select split section images to download together.
- Check / Uncheck all
- Operates all download target checkboxes together.
- Download selected
- Downloads items with checked download target checkboxes together.
The download may take some time to start.
Account Screens
Screen List
| Screen Name | URL | Overview |
|---|---|---|
| Sign Up Screen | /chikyu/auth/register | Create a new account. |
| Login Screen | /chikyu/auth/ | Log in. |
| Password Reset Screen | /chikyu/auth/forgotpassword | Reset password. |
Screen Transition Diagram
Sign Up Screen
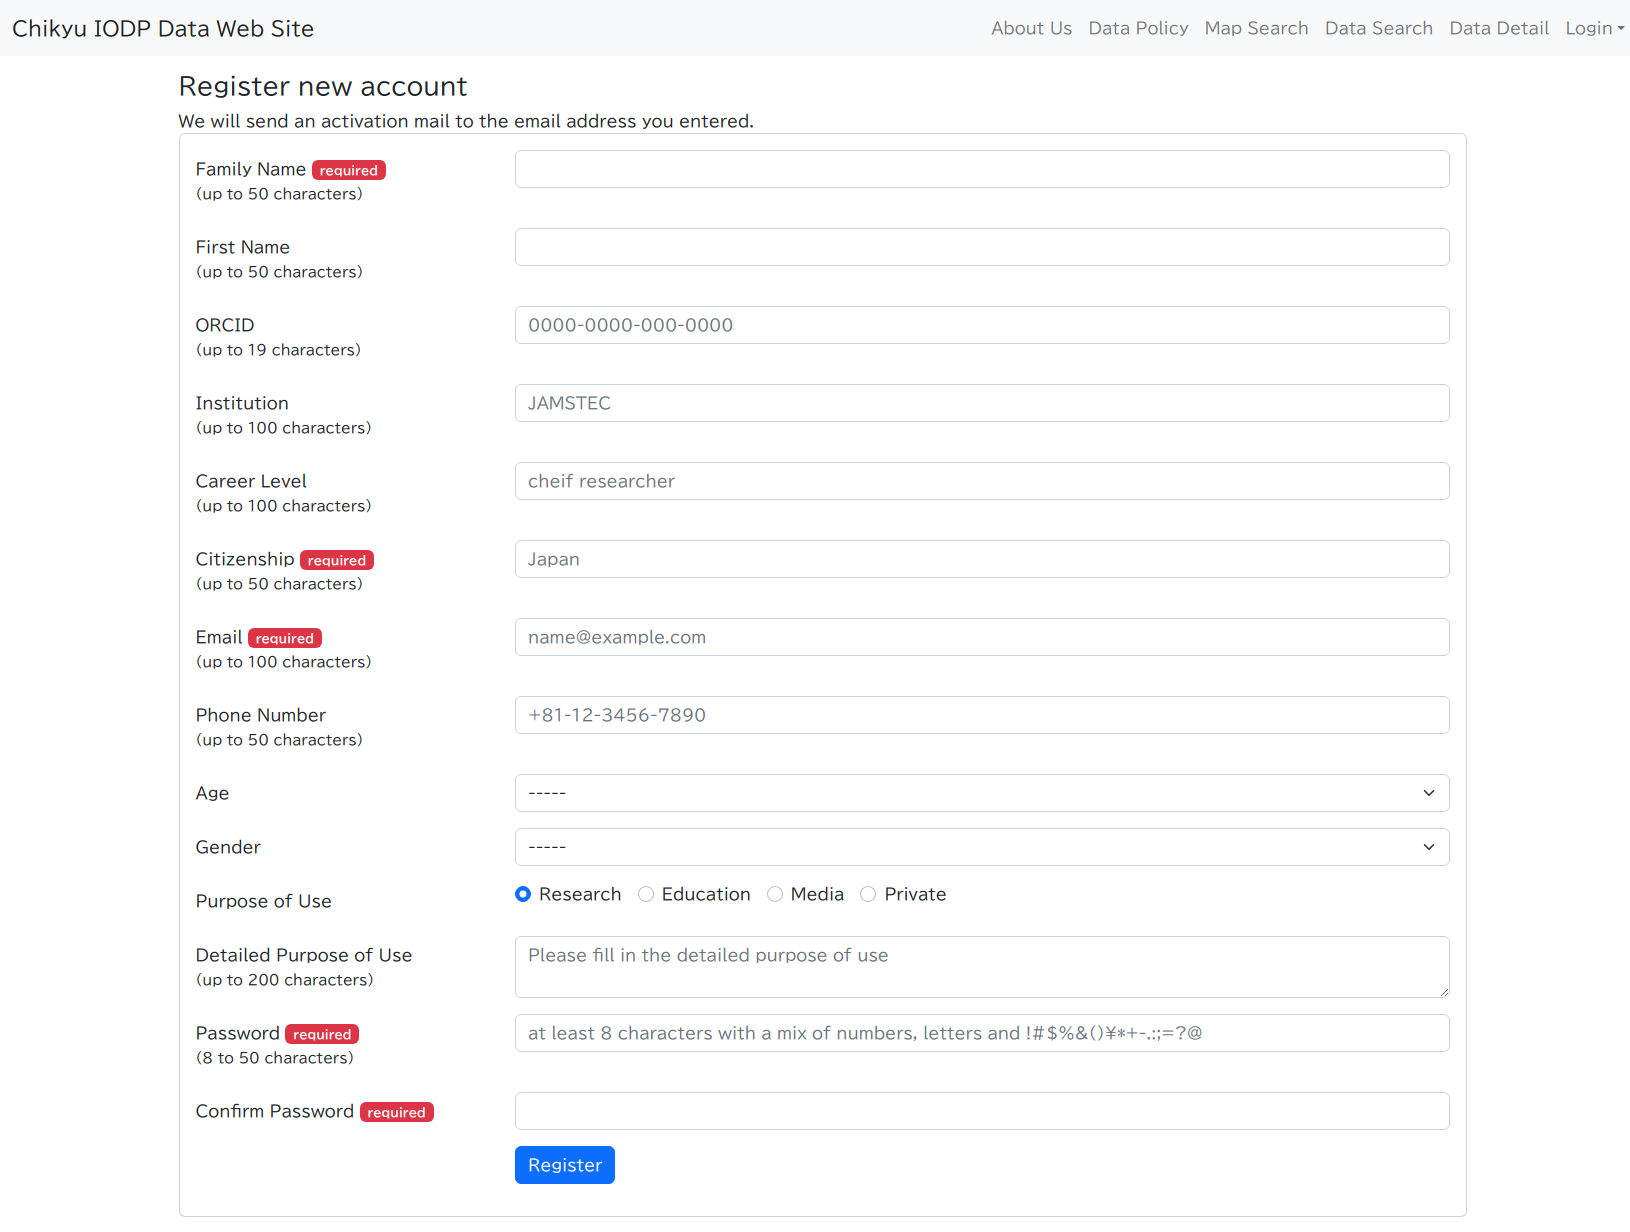
Sign Up Screen Overview
Enter the required information and press the Register button to receive a registration confirmation email at the specified email address.
The account is activated by opening the link in the email within a certain time period.
Login Screen
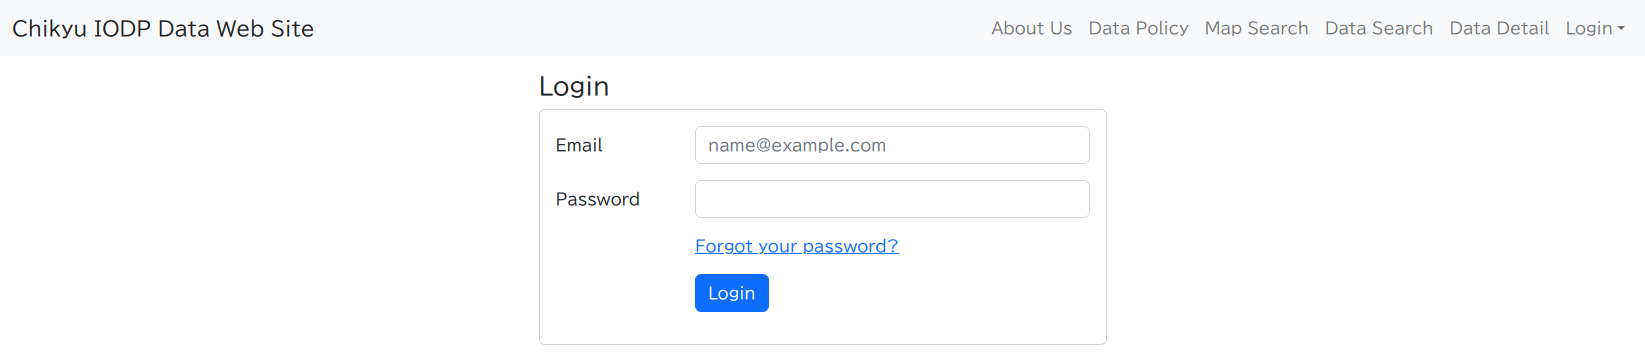
Login Screen Overview
Log in by entering the email address and password set during sign up.
Password Reset Screen

Password Reset Screen Overview
Enter the email address set during sign up to receive a password reset email at that address.
Change the password by opening the link in the email within a certain time period and entering a new password.